Your First Steps with Radegast EDR
At Radegast EDR, our goal is simple — make security easy for everyone. No matter your experience level, we believe protecting your endpoints shouldn’t be a headache.
That’s why we put together this guide! The steps below will walk you through the installation process in a straightforward and painless way, so you can get up and running in no time.
Step 1 - Account Creation
To get started, navigate to https://console.radegast.app/ui/login in your browser.
On the login page, click Register and fill in your email address and a password of your choice.
Once submitted, you will receive a confirmation email at the address you registered with. Open that email and click the confirmation link to verify your account — after that, you’re ready to log in.
Step 2 - Enrolling Your First Device
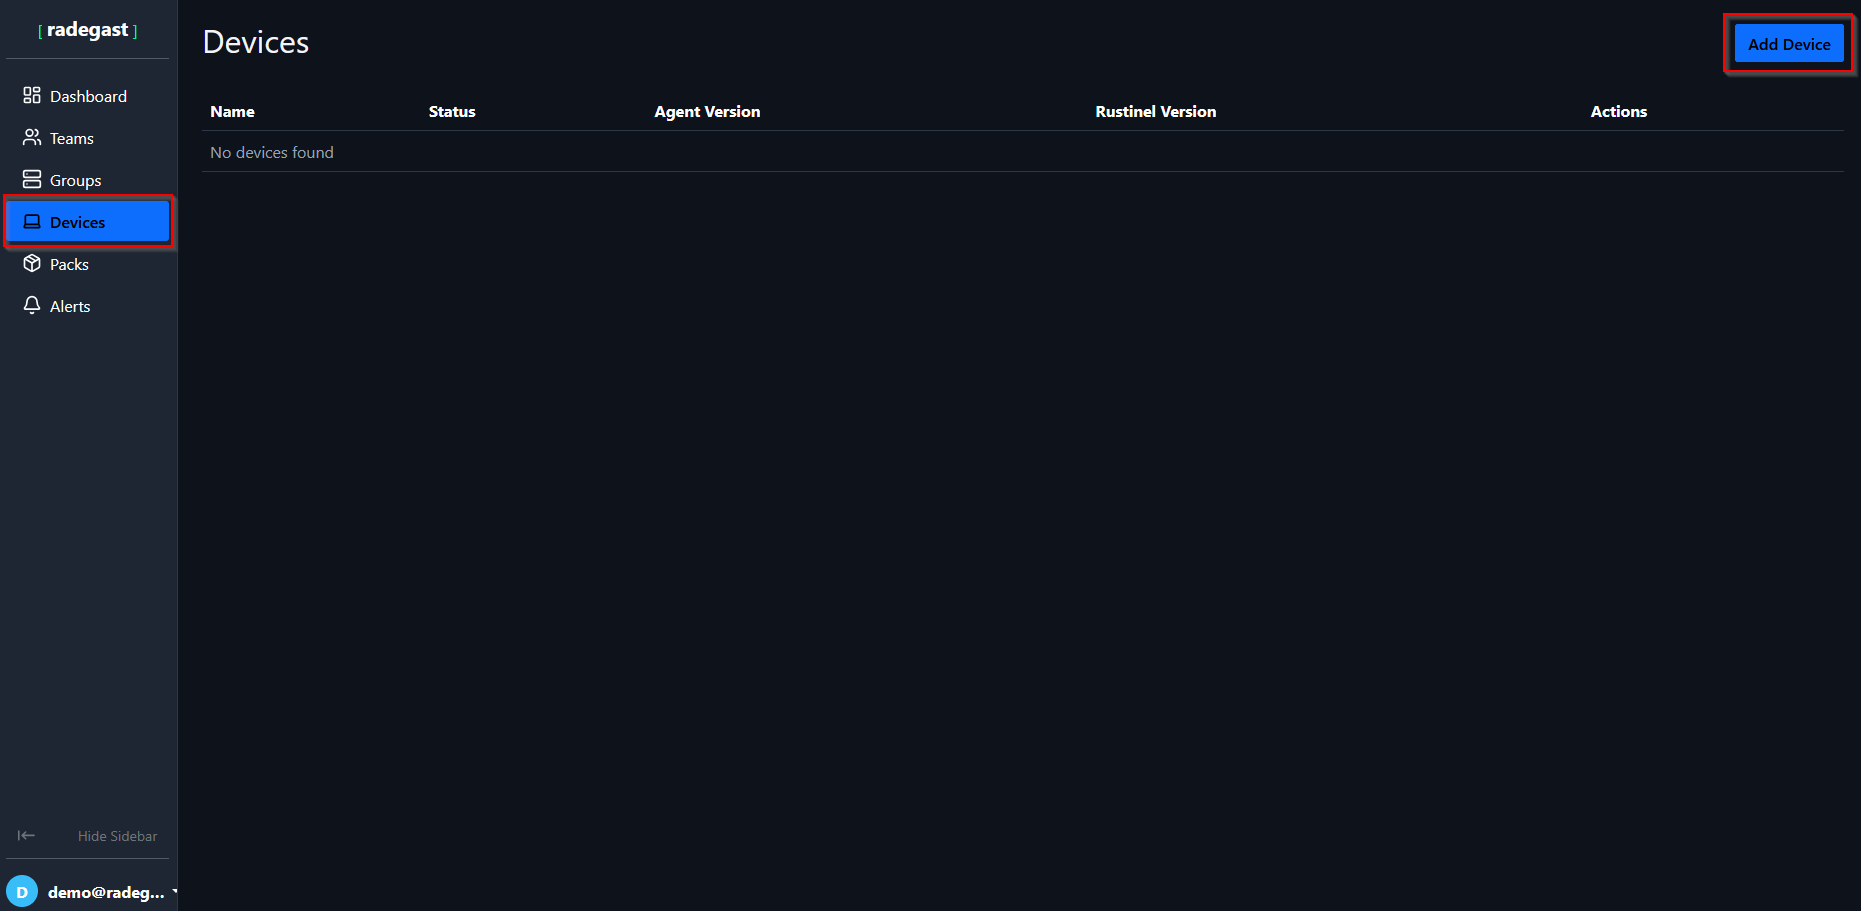
After logging in, navigate to the Devices tab from the main menu. Once the page loads, click Add Device to begin the enrollment process.
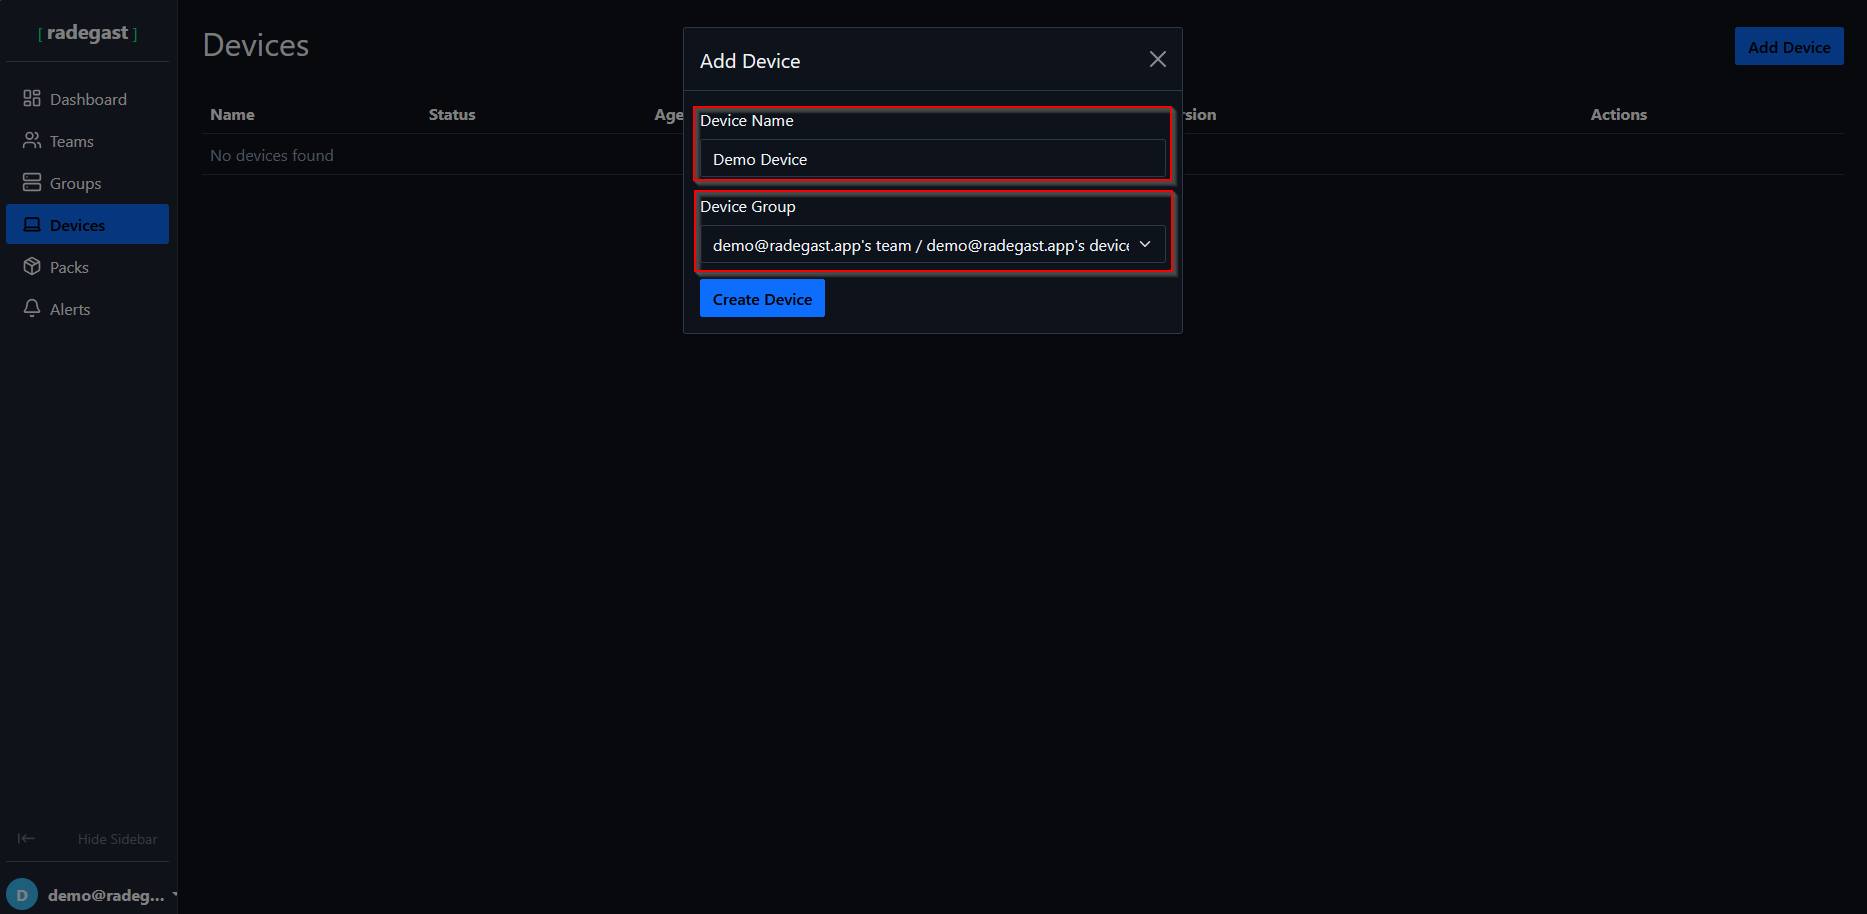
Once you click Add Device, you will be prompted to enter a name for your new device and assign it to a group. If your account was just created, a default group with your account name has already been set up for you — simply assign your device to that group to get started.
Once the device is created, select the operating system of your device. The console will then display step-by-step instructions tailored to your OS — simply follow them to complete the installation.
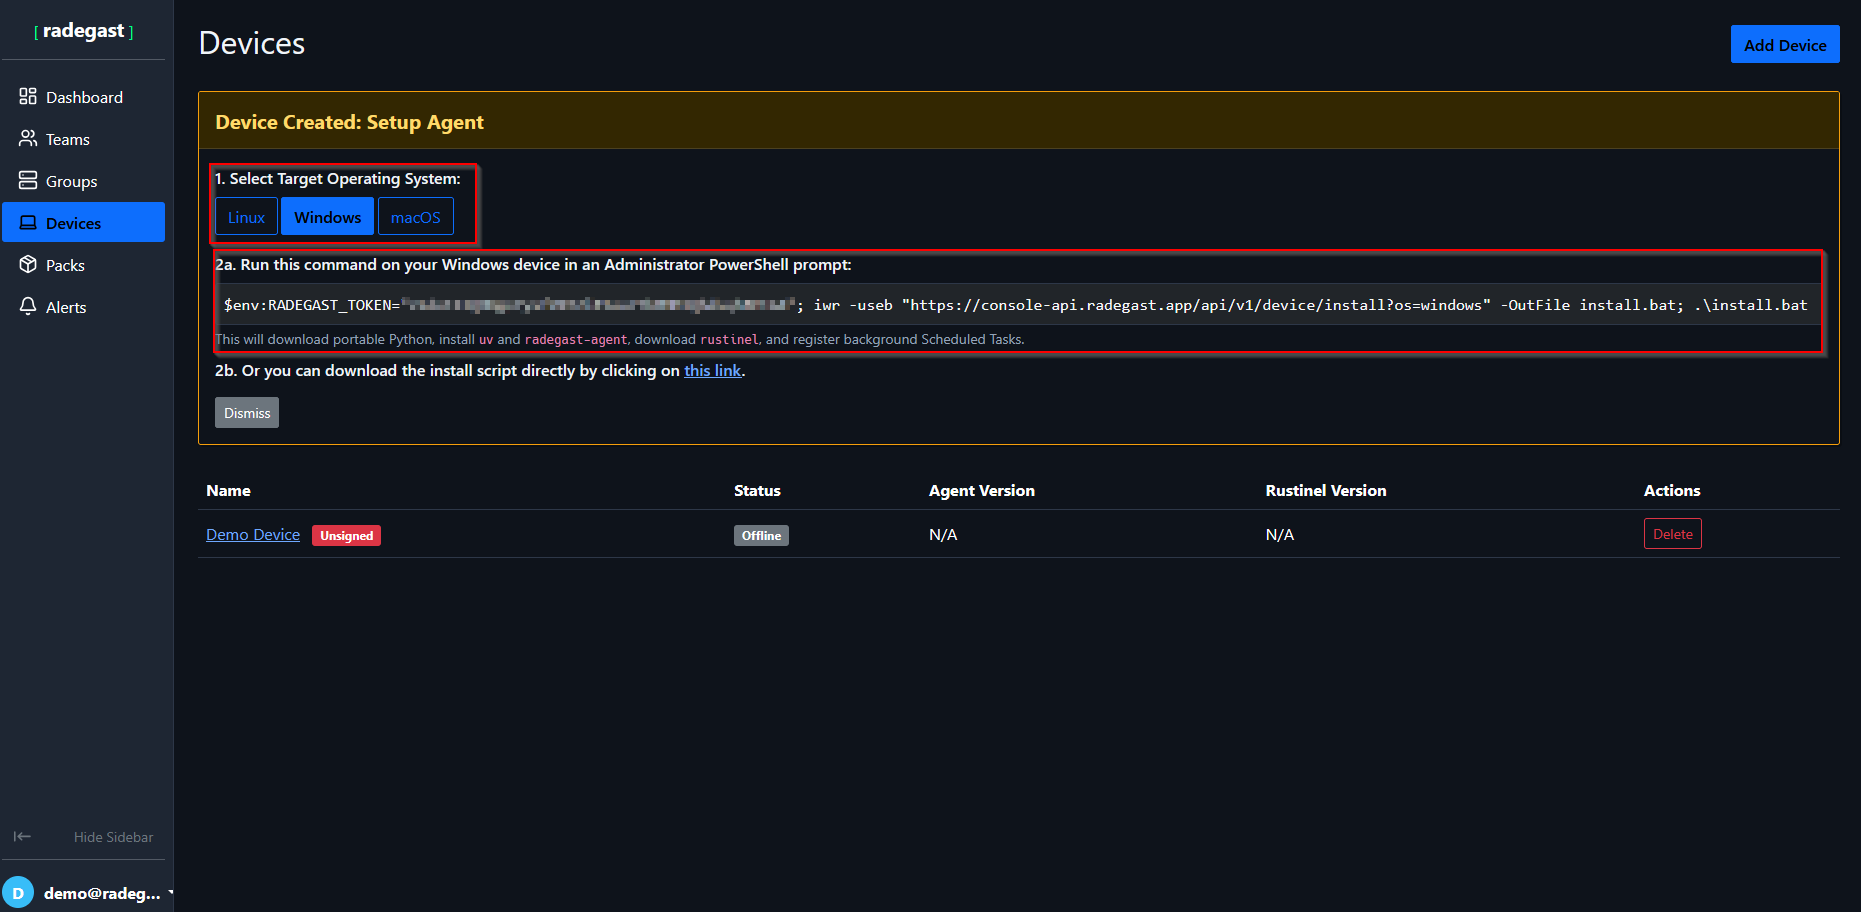
If the installation was successful, your device should appear as shown below:

Step 3 - Enable Detection Pack/s
After the successful installation of the agent on your device the only remaining step is to assign a detection pack in the group that your device is assigned to.
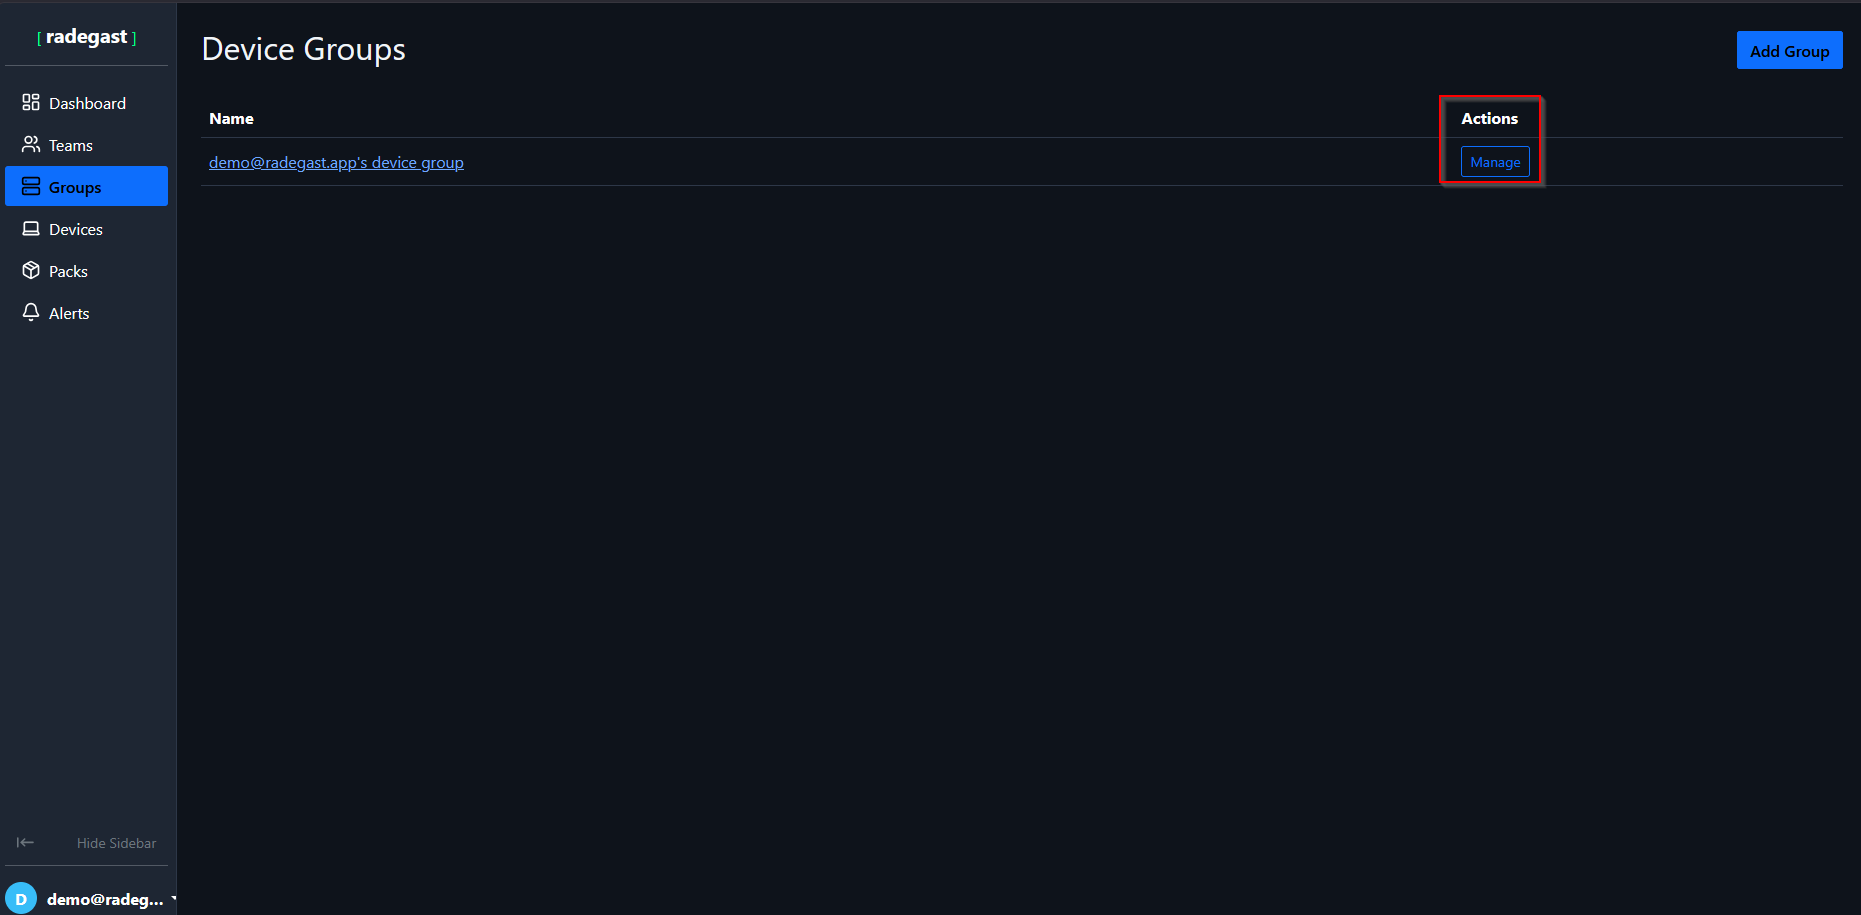
So navigate to the Groups tab and identify your groups. In freshly created accounts the default Group will appear.
Click the Manage button and add your device if is not already added.
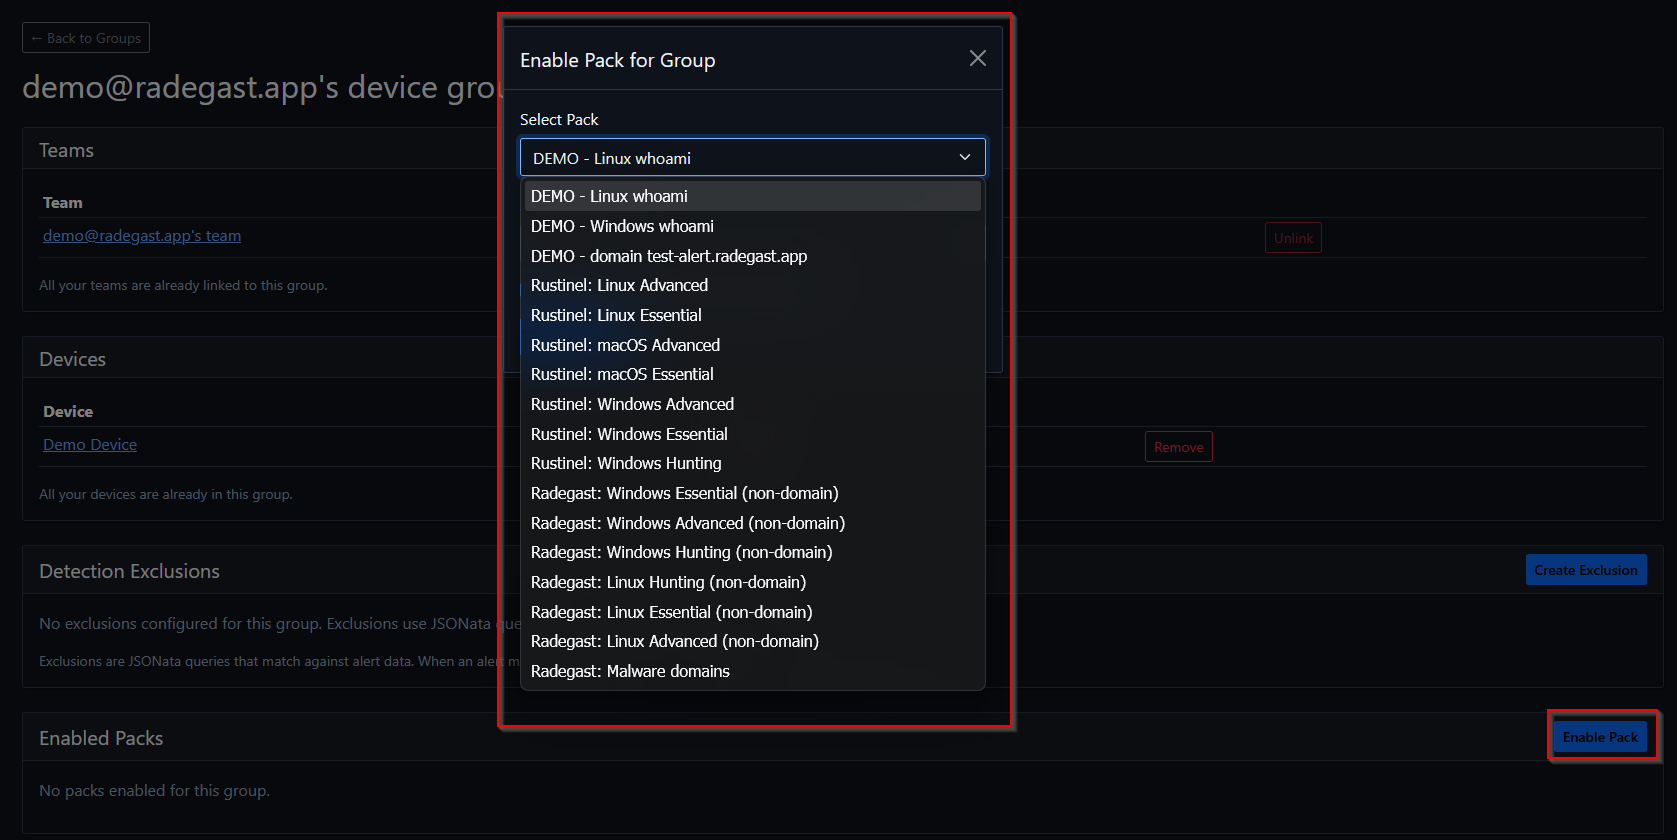
In the group’s management page click the Enable Pack button and choose the pack that is matching your OS and the level of protection that you want.
Notes
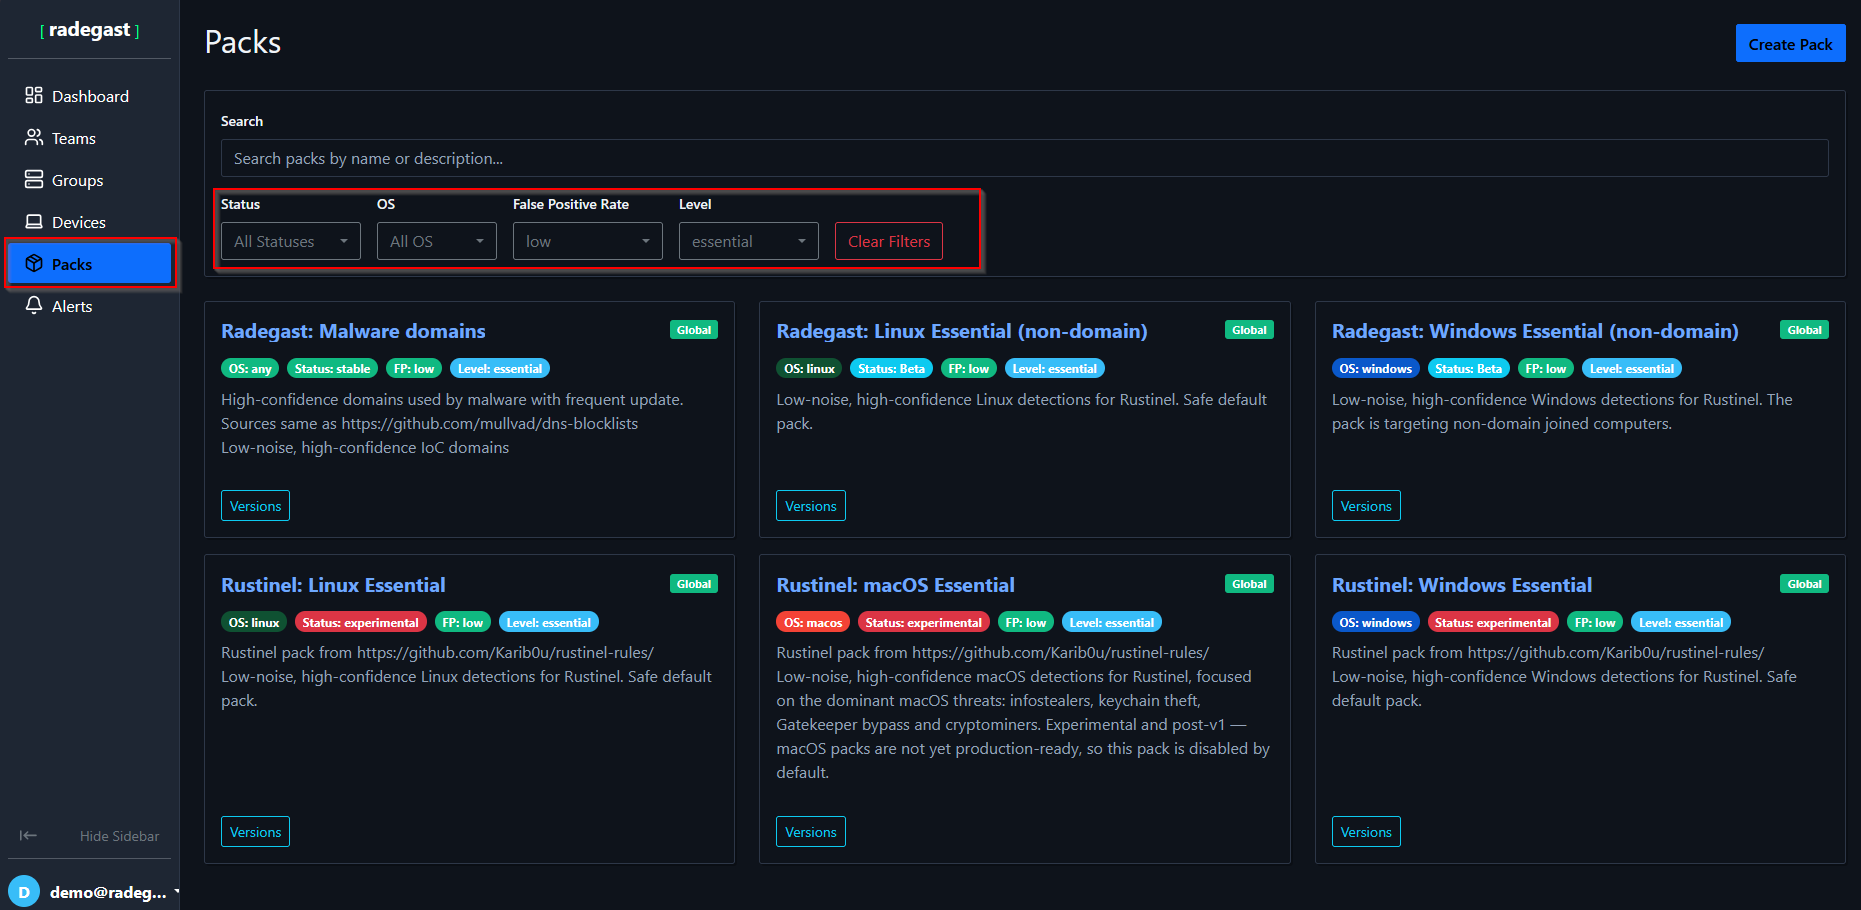
You can browse all available detection packs by navigating to the Packs tab. From there, you can filter packs based on Status, OS, False Positive Rate, and Level to find the ones that best fit your environment and security needs.